How to Migrate Office 365 Domain to Another Tenant? Detailed Guide

Whether it is a merger or an acquisition, regardless of the reason, users look to migrate domain between Office 365 tenants. Therefore we have drafted this technical writeup to explain the complete procedure on how to migrate Office 365 domain to another tenant. We will share all the steps to perform the migration in detail, so you can follow through properly. Thus, without any further ado, let’s get started with the guide.
Office 365 aka Exchange Online is one of the most popular office productivity suites subscribed by a myriad of users. The suite provides users full access to every Microsoft application. Moreover, there are numerous reasons why users look for ways to migrate Office 365 domain to another tenant. We have gathered the top causes behind the migration and mentioned them here.
Reasons to Migrate Domain Between Office 365 Tenants
- Acquisition and merger of businesses require migrating domain/s and their users’ data between tenants.
- When a business undergoes a divestiture (splits up), it becomes necessary to migrate domain/s to other tenant/s.
- Consolidation of Tenants for cost optimization is also another reason why businesses look to migrate a domain to another tenant.
Now that we are aware of the primary potential causes of the migration, let us move ahead and know the detailed procedure on how to execute it.
How to Migrate Office 365 Domain to Another Tenant?
Migrating an Office 365 domain from one tenant to another might seem like an overwhelming process unless one knows the correct execution of the process. Don’t worry, we got you! Here, we have shared a step-by-step process to perform the Office 365 domain to another tenant migration process successfully. The entire process can be divided into four stages:
- Stage #1: Migrating User data from the source domain to the target tenant,
- Stage #2: Detaching the domain from the source tenant,
- Stage #3: Attaching the domain at the target Office tenant, and
- Stage #4: Migrating user data back to the newly attached domain.
So, these are the four main stages one needs to perform in order to migrate Office 365 domain to another tenant. Furthermore, we will explain each of these stages in the following segments of the article.
First and foremost, one needs to know why all four stages are of equal significance. This is because a domain cannot coexist with two Office 365 tenants at the same time. Therefore, it must be detached from the source tenant first and then attached to the target tenant.
Stage #1: Migrate Domain User Data to Target Tenant
The first step is to migrate domain user data to the temporary folders of the target tenant. Unfortunately, Microsoft itself doesn’t provide any direct manual method to transfer the domain user data to the target tenant. Therefore, it encourages users to go for an automated utility to ensure a secure and reliable migration process. Thus, we have brought you the one and only software recommended by countless experts. Let us know more about it.
Expert Recommendation to Migrate Domain User Data Between Tenants
Data migration is no easy task and since there is no direct method to migrate Office 365 domain user data to another tenant, we have brought you the ultimate MSOutlookTools Office 365 to Office 365 Migrator. It is recommended by countless technical experts as it provides the utmost reliability to its users. The software is equipped with specially designed features to make the entire process easygoing and hassle-free for users to execute. Using this tool, you can migrate user data from the domain to the temporary folders of the target tenant in just a few simple steps. So, without further ado, let’s have a look at the steps to use the utility to accomplish the task.
Steps to Migrate Office 365 Domain to Another Account Using the Utility
- Select Office 365 as the Source as well as Destination.
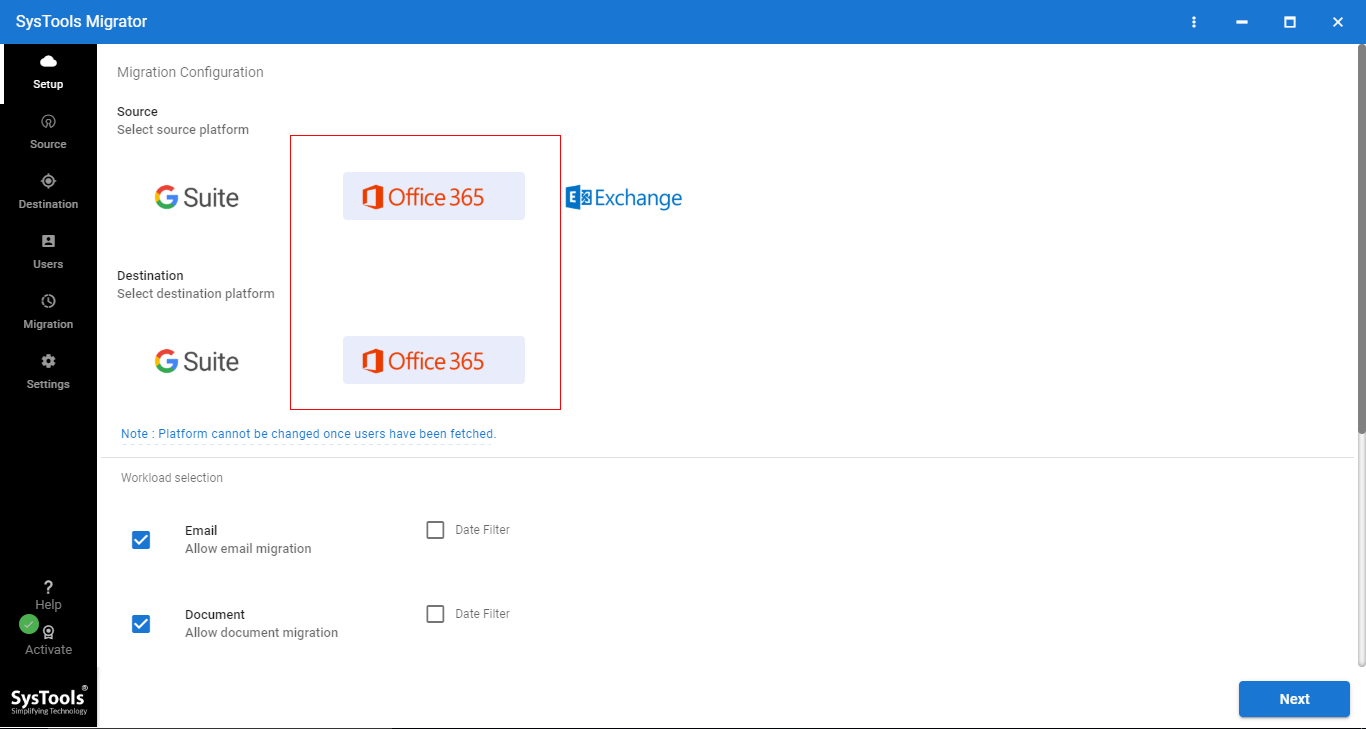
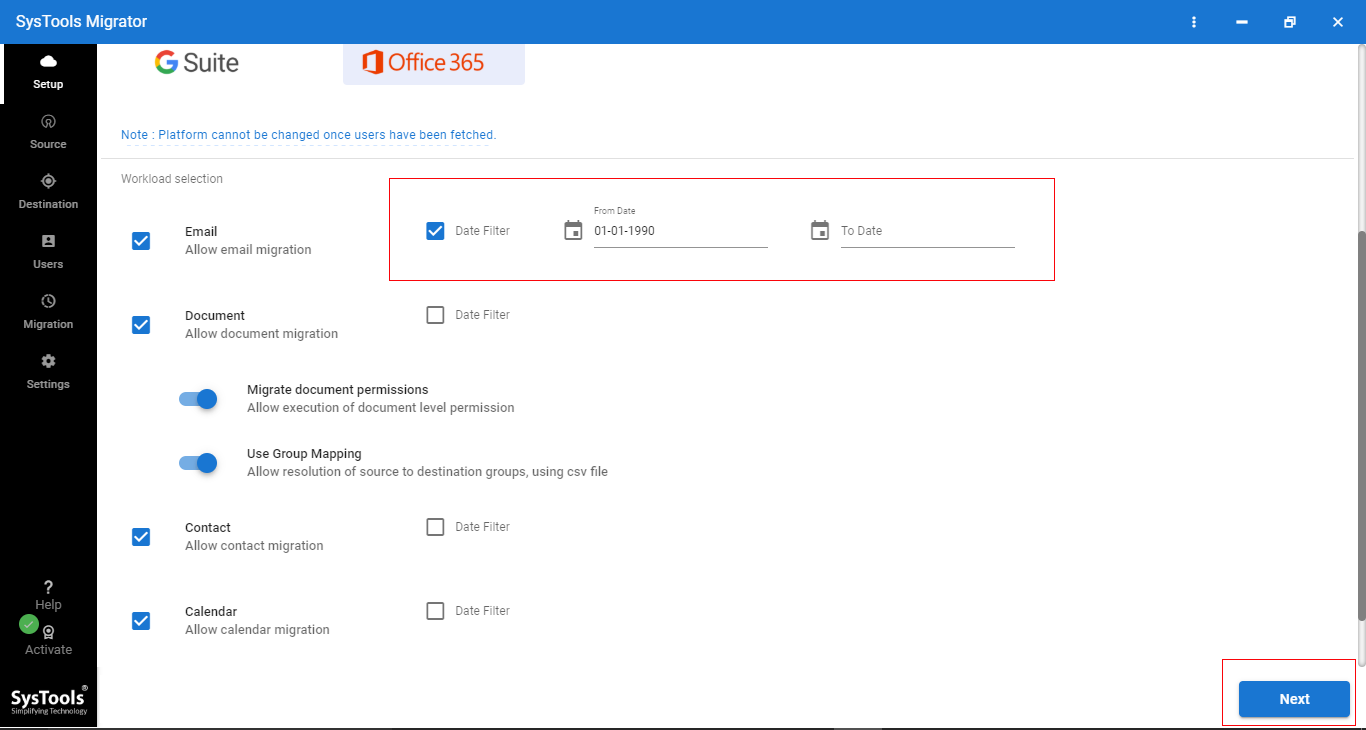
- Check the boxes for the data items that you want to migrate from the Office 365 domain to the target tenant’s temporary folders.
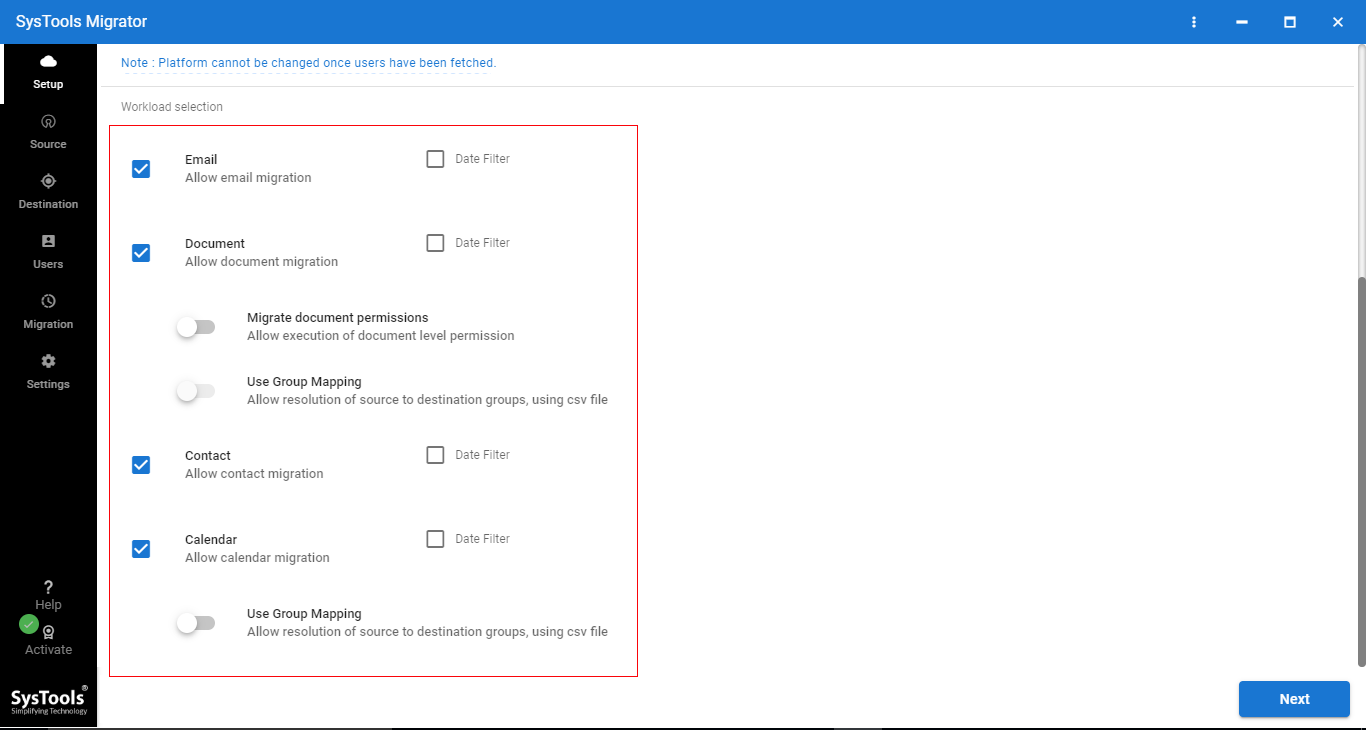
- Turn on the toggle buttons for the “Migrate Document Permission” and “Use Group Mapping” options. If you want to move selective data, the date filter option is also available.
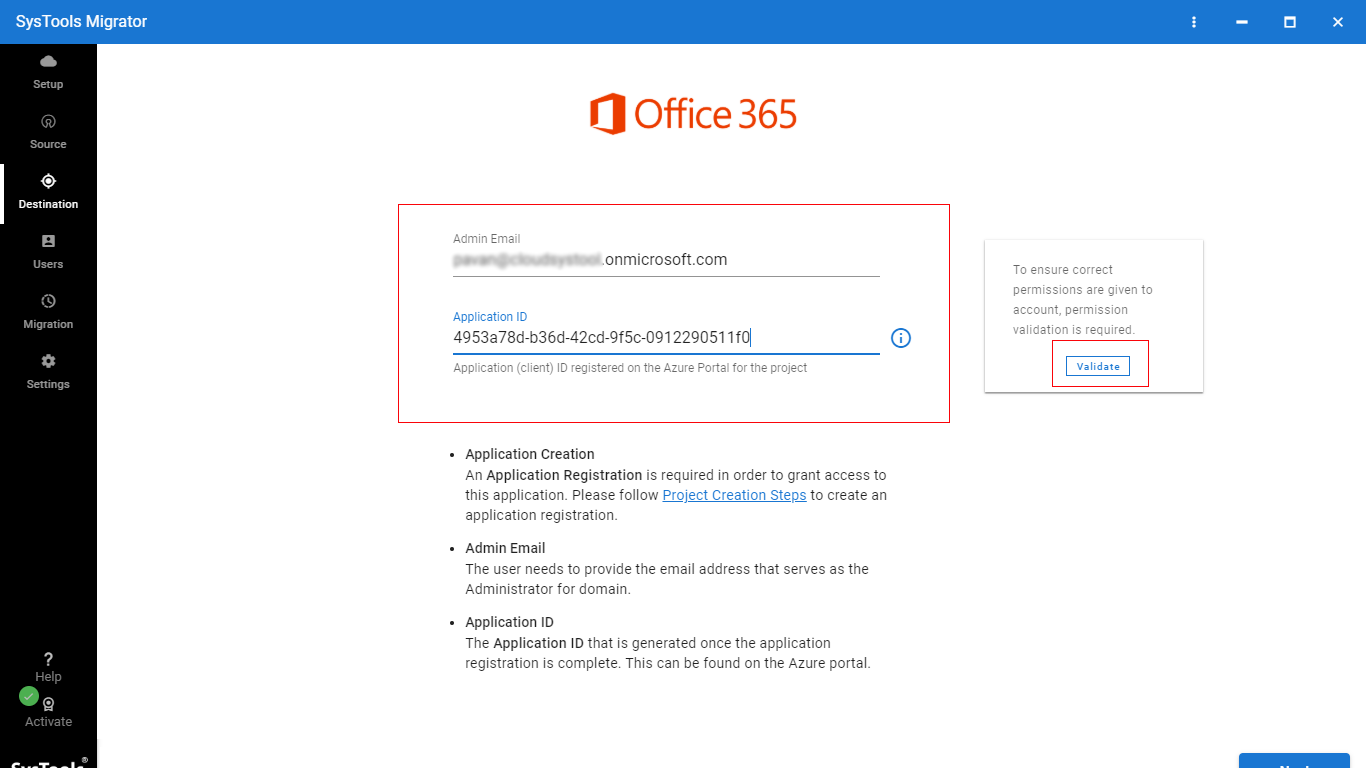
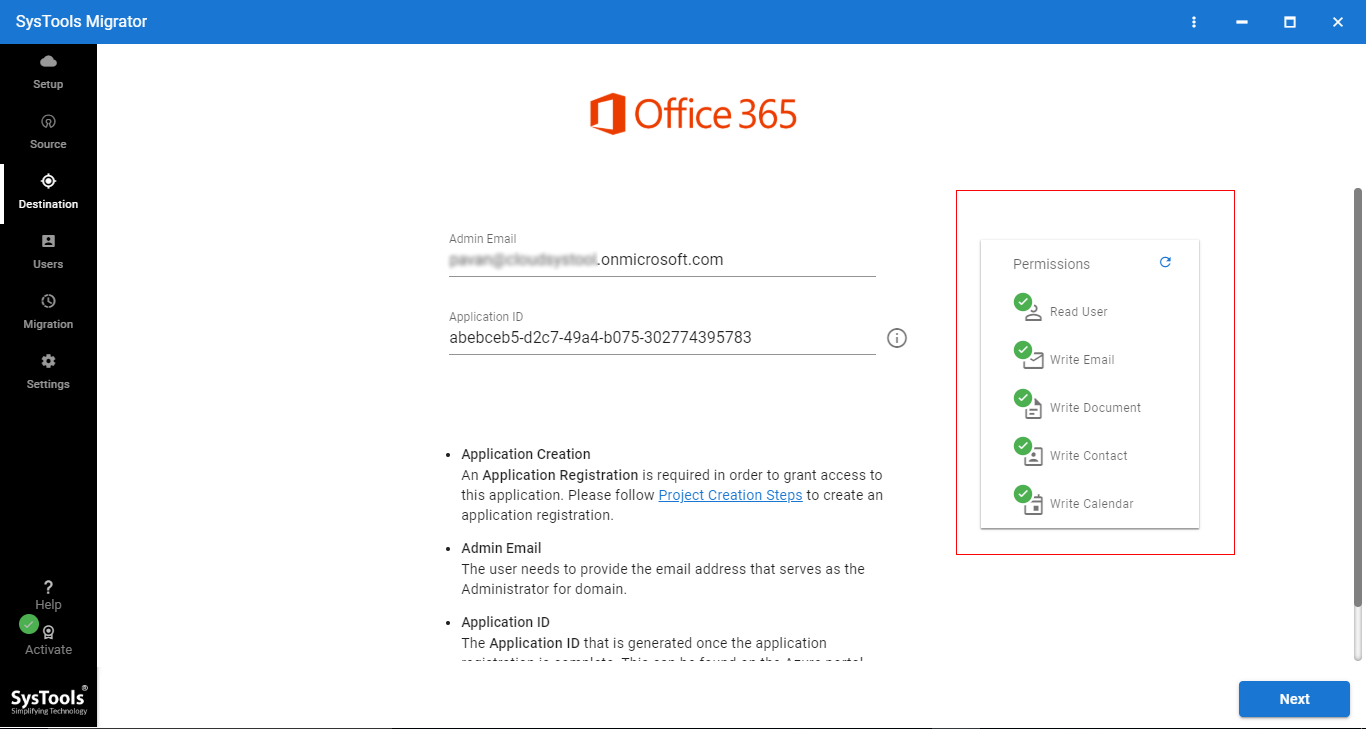
- Next, log in to the source Microsoft 365 account by providing Admin Email ID and Application ID. Proceed to click the Validate button to validate the permissions.
- Upon doing so, log into your target Office 365 tenant and validate the permissions.
- Afterward, Download Template to maintain the Source M365 Domain Users’ ID and Target Office 365 Users’ ID. Then, import this CSV File into the utility to create the mapping.
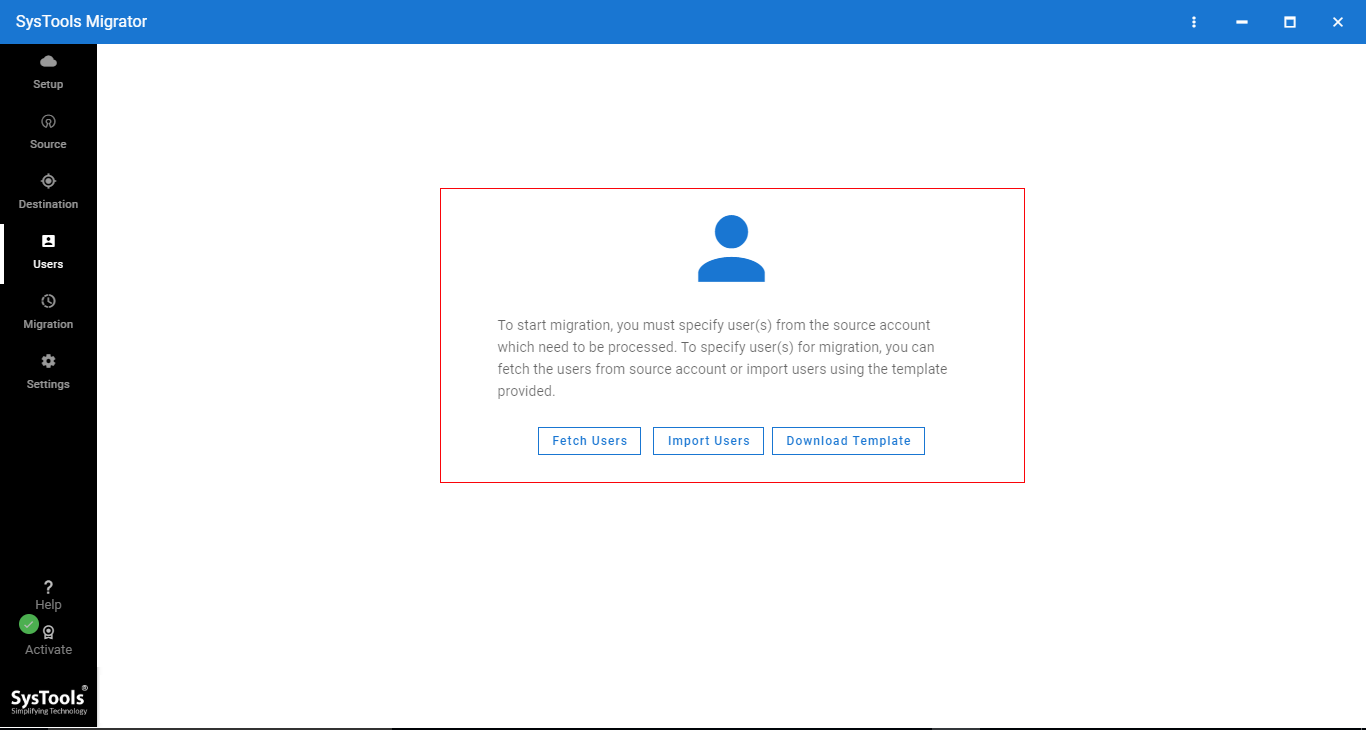
- Click on the Validate button to validate permission upon adding the CSV file.

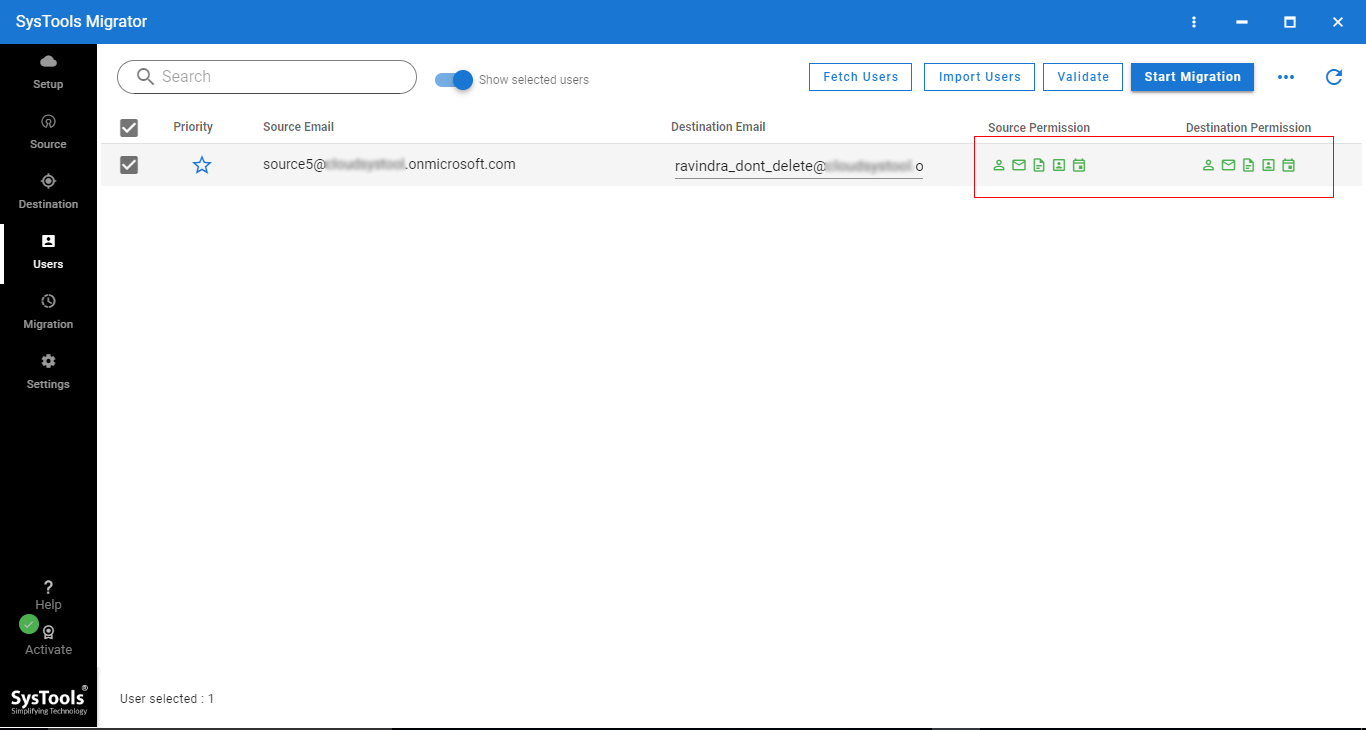
- Once you do that, you are ready to migrate Office 365 domain to another tenant. Click on Start Migration to start the process of transferring source domain users’ data to target tenant temporary folders.
And you’re done with stage #1 of the migration process. Now that you have transferred all the users’ data, it’s time to detach the domain from the source (old) tenant.
Stage #2: Detach Domain From the Source Tenant
After you have migrated your Microsoft 365 user data to the temporary mailboxes of the target tenant, it is time to detach the domain from the source tenant. Here’s how to execute the process:
- Head to Settings >> Domain Page from the Admin Centre.
- Select the name of the Domain that you want to detach.
- Then, from the right pane, select Remove.
Once you detach the domain from the source (old) tenant, it takes 2 days to detach. As mentioned above, a domain cannot coexist with two Exchange Online tenants at the same time. Thus, during this detachment time period, you cannot attach the domain to the target (new) tenant.
Stage #3: Attach Domain at the Target O365 Tenant
After the domain is detached from the source (old) tenant, the next step is to attach the domain to the target (new) Office 365 tenant. Here’s how to execute the third stage of the “migrate Office 365 domain to another tenant” process:
- Head to the Admin Center, then, select Settings >> Domains Page.
- Choose Add Domain.
- Next, enter the name of the domain you want to add and click on Next.
- Then, select “How you want to verify that you own the domain”.
- Upon doing so, Verify the domain.
- Afterward, select how you want to make the required DNS changes for Office to use your domain. The provided options are:
- Add the DNS Records for Me – Choose this option if you want Office to configure and add your DNS automatically.
- I’ll add the DNS Records Myself – Choose this option if you want to add the DNS records by yourself.
- Once you’re done with that, click on Finish to successfully migrate Office 365 domain to another tenant.
Follow this step-by-step tutorial with utmost caution to ensure successfully migrating and attaching Microsoft 365 domain to another tenant. Once you have attached the domain to the new Exchange Online tenant, migrate your previously transferred data back to the domain.
Stage #4: Migrate User Data Back to the Domain
Now we have come to the last stage of Office 365 transferring data to another domain. This stage involves migrating previously transferred data back to the freshly attached domain.
To complete this stage, you first have to create user mailboxes in your Micorosft 365 domain with respect to the source (old) tenant. Upon doing so, proceed to repeat the same steps as Stage #1 i.e., migrate Office 365 domain user data to another tenant to migrate the transferred domain user data back to the freshly attached domain.
Once you complete this stage, you have successfully migrated Office 365 domain to another tenant.
Furthermore, if you wish then, you can also backup your Office 365 mailboxes using the Office 365 Backup Tool. It consists of the best features needed to ensure a successful backup of all your Office 365 data. The tool is a personal favorite of countless technical professionals as it keeps user data secure and intact throughout the backup process.
So There You Have It
In this technical writeup, we discussed how to migrate Office 365 domain to another tenant. To accomplish the task, we shared a fully detailed guide to help you with proper execution. Along with that, we shared the potential reasons and causes behind why users look to move their Microsoft 365 domain to another Exchange Online tenant.
Since, there is no manual solution to transfer the domain user data to temporary folders of the target (new) domain, technical professionals and Microsoft itself recommend opting for an automated utility such as the one mentioned above. The above-mentioned expert utility is recommended due to the incredible reliability it provides throughout the migration process.
Read More:
- Office 365 Backup Best Practices to Secure Data and Ensure Business Continuity
