Get Email Delivery & Read Receipts Confirmation

“If you’re sending an important message and want to be sure that the recipient will get it and open it. Or in other words if you want to get delivery and read receipts confirmation then, you can easily add delivery and read requests to this single message:”
By using the Outlook delivery and read receipts confirmation rule you will notify individual messages also when the receiver gets the messages and opens them. When you send an important message to someone then you can request one of them or both at once. Or you can add read receipts to all your emails. It’s even possible to create a special read receipt rule. Would you like to know how to do it? Go ahead and read this article!
Let’s Define the Difference Between Delivery & Read Receipts
A delivery receipt informs you that your email message was or wasn’t delivered to the recipient’s mailbox. There is no guarantee that the email is in the recipient’s inbox. It can be accidentally removed to the junk e-mail folder.
On the other hand, the read receipt notifies when the user will open the message. The person who sends opens the message sends the read receipts. If you get a confirmation that your email is read by the address, it is obvious that the user gets the email as well.
Set Delivery & Read Receipt Confirmation for Single Mails
Step 1
- Firstly, create a new “Email“.
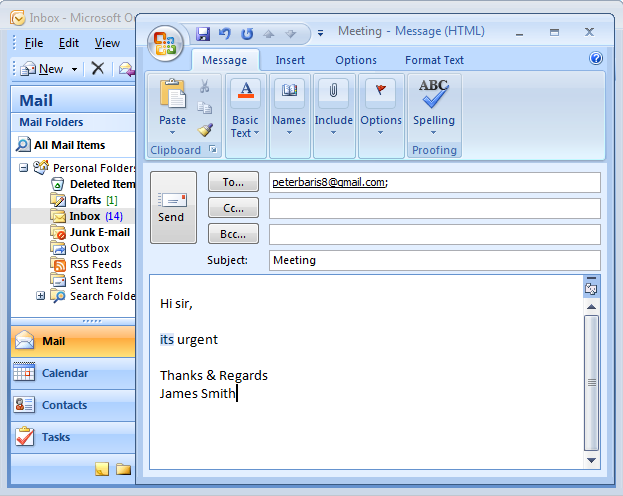
Step 2
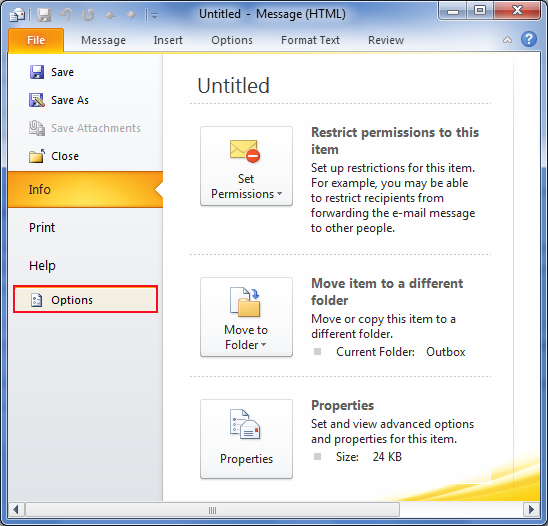
- Secondly, click on the “Options Tab” in the New Email window.
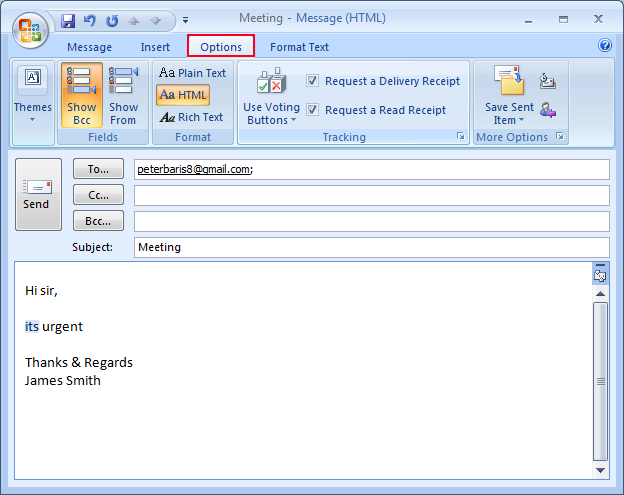
Step 3
- Tick the “Request a Delivery Receipt” and after that, the “Request a Read Receipt” boxes in the Tracking group.
![]()
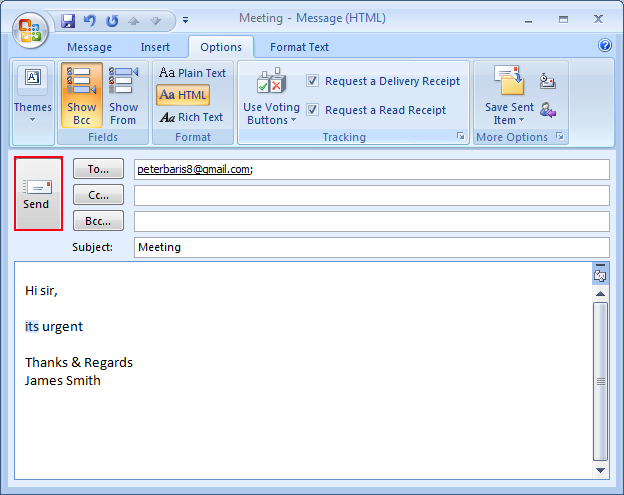
Step 4
- Next, press the “Send” button.
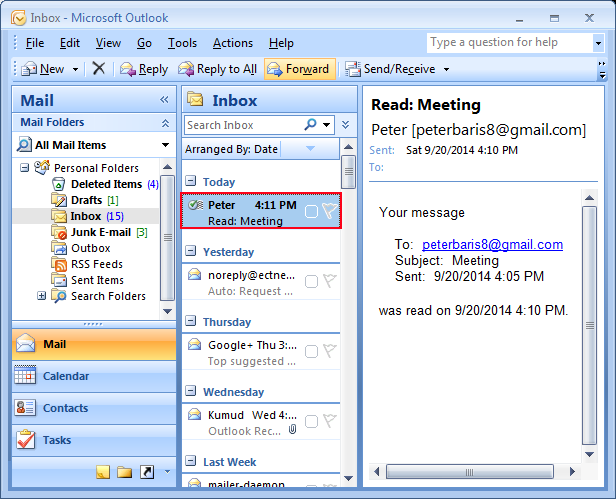
Step 5
- If the recipient opens the message, then, you will get an email notification like the one below:
- Furthermore, if you want to track all Sent messages of Outlook by default, then enable the Delivery and Read Receipt confirmation option.
For Outlook 2002, 2003, and 2007:
Step 1
- Go to the “Tool” menu and then, click on “Options“.
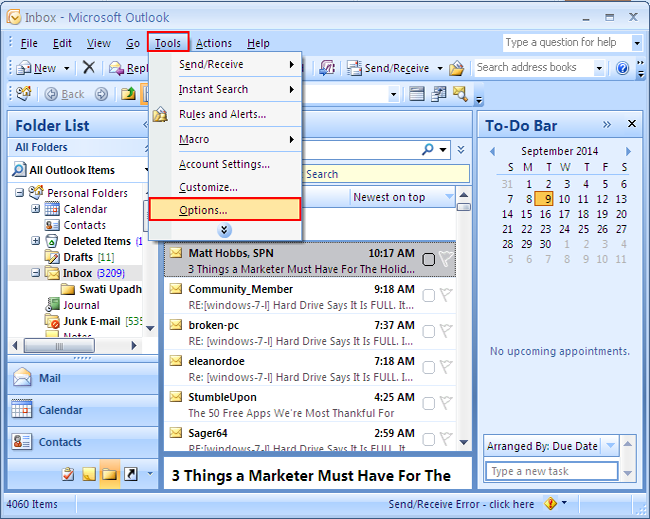
Step 2
- Here, on the “Preference” tab, click on “E-mail Options” under E-mail and then click on “Tracking option“.
![]()
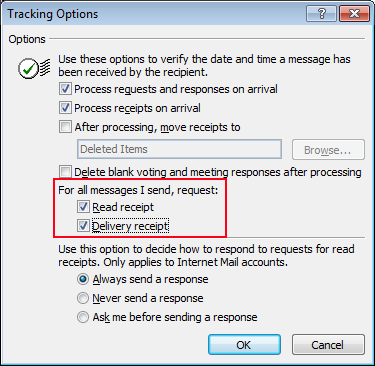
Step 3
- Now, checkmark on “Read Receipt” and “Delivery Receipt” under “For all messages I send, request“.
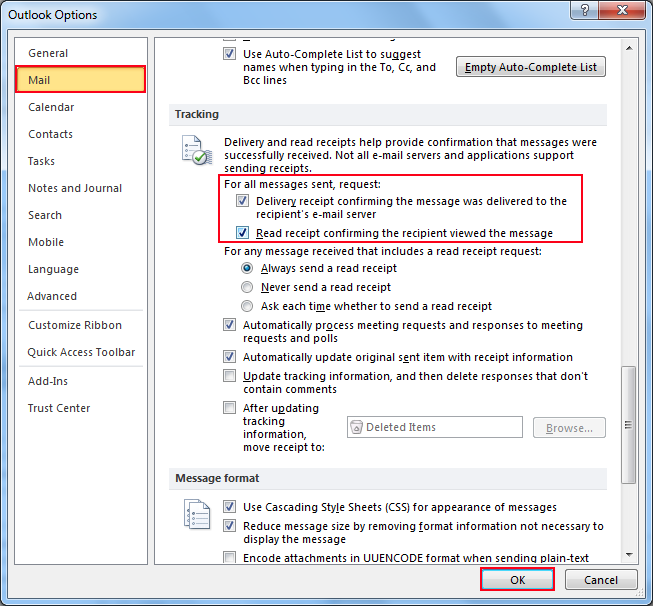
Read Receipts Confirmation For Outlook 2010 and 2013:
Step 1
- Go to File >> Option.
Step 2
- Afterward, select the “Mail” option.
- At last, under the tracking option, checkmark the box “Delivery receipt confirming the message was delivered to recipient email server“.
By applying these settings, you will be able to get confirmation as you want. But, keep in mind that the recipient has the power to decline to send a read receipt as I have already mentioned above.
The Bottom Line
The above blog explains how to set delivery & read receipts for single as well as multiple emails in various Microsoft Outlook versions in a few clicks. As a result, by applying these steps, you will get the assurance of your emails.
